

This post may contain affiliate links, view our disclosure policy.
Hi Sweet Friends! Today, I’m sharing my self tanning routine and favorite tanning products. I don’t know about you but I love a good tan and the healthy glow my skin has with some extra color! So I maintain a (very fake) year-round tan, and yes I even self tan in the Summer 😉
Why I Use Self Tanning Products:
Back in my 20’s, I could not get enough of tanning beds and laying out by the pool with all of the oils that I could find. Yes, completely guilty, that was me. Now that I’m much more wiser and mature, haha, I’ve seen first hand all of the sun damage that I caused by tanning in the sun and tanning beds. Since this realization, I have stopped completely and I now only self-tan.
I love using self-tanner but if you’ve never self-tanned before or are new to the process, it can be overwhelming. For starters, there are so many products to choose from and many of them can leave you with streaks or an overly tan color. Then, there’s the actual application of the self tanner and how to apply it properly. To help make the process easier, I’m sharing my self tanning routine and favorite tanning products.
My Self Tanning Routine:
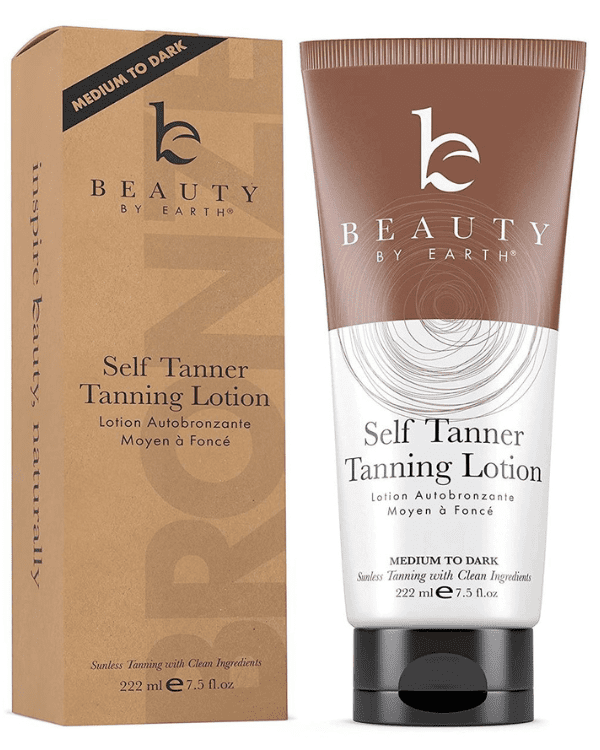
I usually self-tan about once a week. It typically lasts about a week, but obviously the first few days are the best! I’ll be honest, every self tanning product that I have used has a smell (some better than others) but I think its worth it to get a great healthy glow! My favorite self-tanning product is a mousse from Body by Earth. After I rinse off, it looks so good! I also like their self-tanning lotion. I recommend trying both to find the products that you love and want to incorporate into your self tanning routine.
Step 1: Exfoliate in the Shower and Shave
To get completely even color, you should always exfoliate and shave the day before you self tan. Self-tanner applies best and stays on longer when the skin has been exfoliated. From experience, I have learned that when you self-tan too soon after you exfoliate and shave, the formula fills into your pores and can leave dark spots, especially on your legs.
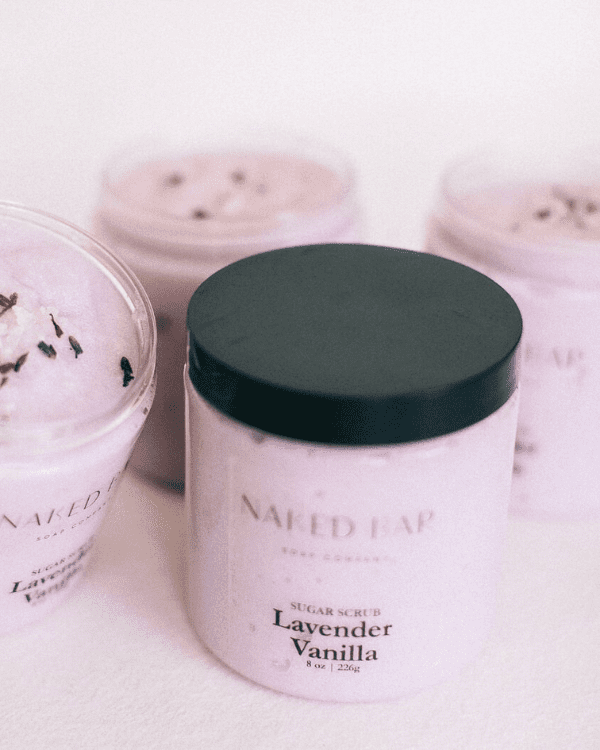
I use shower gloves or a loofah with a good exfoliator. I have shared my favorite exfoliator that I use below. I seriously love this body scrub by Naked Bar Beauty Co! The Lavender Vanilla scent is incredible, and they also have a birthday cake scent I really love. Before applying self tanner, make sure that you don’t have any lotions, oils, or deodorants on your skin. Clean, dry skin is best.
Step 2: Apply the self tanner generously
It helps to break up your tanning application into three sections: legs and booty, stomach and chest, and then lastly arms and shoulders. I start on my legs and work my way up my body. For my back area, I usually have my husband, Daron, help me apply the tanning mousse. I gently cover the entire area, and if it gets too thick in one place, I use a tanning mitt to lightly pat the tanning spray into my skin.
Once again, my favorite tanning mousse that I use is from Beauty by Earth. I pump 1-2 pumps on the self-tanning mitt (my favorite is by Loving Tan). Using the self-tanning mitt, I put a few squirts of the mousse on every body part so there’s always enough product on my mitt to ensure smooth and full coverage over my skin with no streaks. I start on my legs and work my way up my body, again breaking my application into three sections.
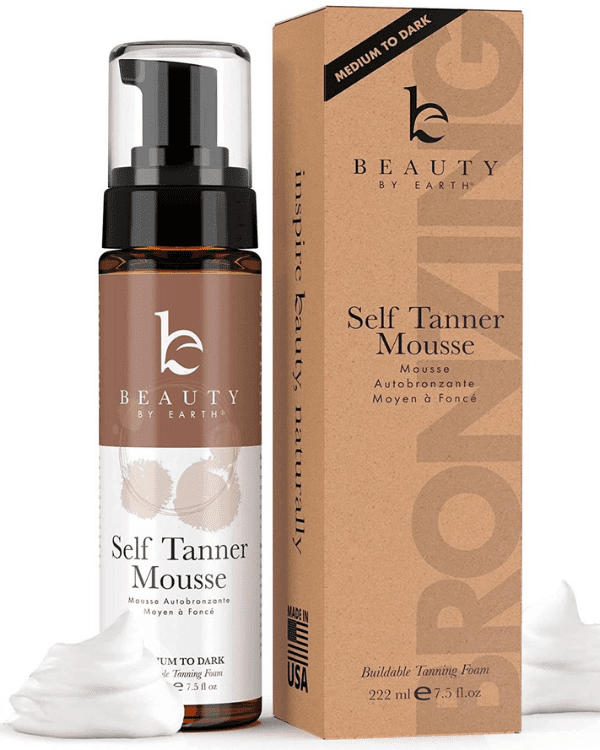
I always end with my hands, feet, and face. Be sure to use the product sparingly on your hands and feet because if you use too much it will look dark, streaky, and unnatural.
Because my skin can handle the dark color, I use the darkest color options in both the lotion and the mousse.
How to apply Self-Tanner to your back
I receive lots of questions about how I apply tanner to my back. To be honest, I usually don’t apply self-tanner to my back anymore. As I mentioned earlier in the post, I ask my husband to help me. If you are applying self tanner to your back, here’s how I recommend doing it as this is what I used to do when it was just me. I suggest using the mousse to cover the top of your back and go down as far as possible. Once the product is rinsed off, there will be a faded line on the spots that you were not able to reach. But I don’t think many people notice.
Another tip I found online is to put a tanning mitt on a wooden spoon and wrap an elastic band around it. Then, you can reach your back all by yourself. I have never tried it, but let me know if you do and how it works, haha!
Step 3: How to Self Tan Your Face
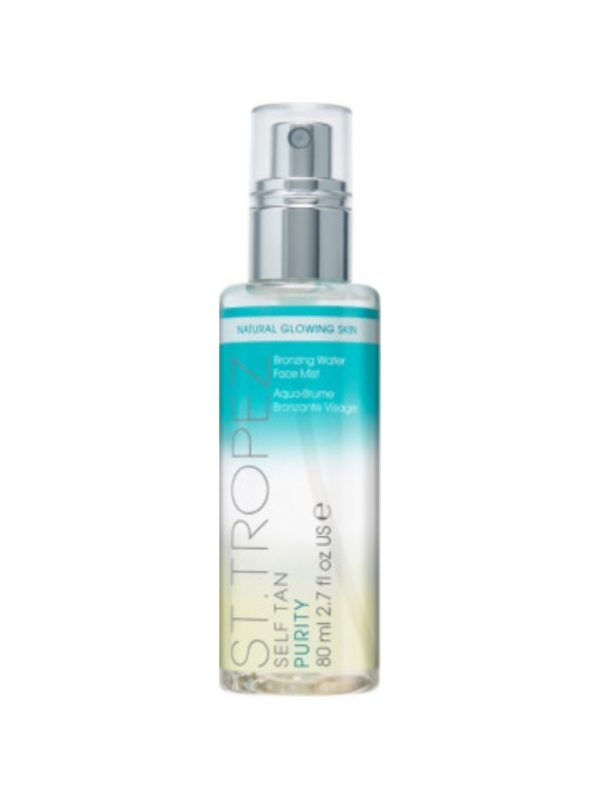
I have found that no matter how much self tanner I use on my face, it doesn’t last as long as it does on my body. For this reason, I usually use the St. Tropez Bronzing Water Face Mist for my face once I finish tanning my body. I’m okay if my face is a lighter shade then my body as I like to add color with makeup, bronzer, and contouring. This product gives my face a nice natural glow.
Step 4: Let the Self Tanner Develop…
I try to always apply spray tanner in the evening and let it dry overnight. While I’m tanning in my bathroom (I self tan in the shower with an old towel on the floor to avoid stains), I put the blow dryer on low and dry as I go.
After you self tan, it’s really important to wear oversized baggy clothes as you don’t want to wear anything that will rub up against your skin or leave marks. I also try to wear long pants and a long sleeve shirt to avoid staining my bed sheets overnight. Also, make sure that the clothing you wear is not too heavy as you don’t want to sweat and cause the self tanner to run or streak.
If you are not going to tan the night before, I recommend letting the self tanner dry for at least 4-5 hours. I also would still wear baggy clothes and avoid sweating.
Step 5: Rinse and Tips for Washing It Off
In the morning when it’s time to shower, or after you have waited at least 5 hours, be sure to gently rinse off. Avoid rubbing or using a wash cloth as you don’t want to rub off the self tanner. It’s okay that the coloring looks like it’s coming off in the shower. Don’t panic as this is just the top layer of color coming off. When drying off, make sure to pat your skin dry and not to rub with the towel.
Step 6: Pro-longing my Tan and Upkeep
To prolong my tan, I apply this lotion one time per day. Make sure to keep your skin moisturized as it will help keep your tan looking its best for several days.
Before self-tanning again, make sure to exfoliate and ensure that your skin is free from all excess self tanner.
My Favorite Self Tanning Products:
- Body by Earth Self Tanner Mousse
- Body by Earth Self Tanner Lotion
- Loving Tan Mitt
- St. Tropez Bronzing Water Face Mist
- Lavender Vanilla Body Sugar Scrub
- Birthday Cake Body Sugar Scrub
I hope you enjoyed learning about my self tanning routine and my favorite self tanning products. I would love to hear your self tanning tips and suggestions along with you favorite products. Leave me a comment or send me a message on social media @ourfarmerhouse!
XOXO,


Stay Connected!
I love comments from you, so feel free to leave your thoughts and let’s chat more below! You can also follow the Farmers on your favorite social platform!
Join The
Farmer House Family
Subscribe to our weekly newsletter for exclusive content offers and access – just like family.