


This post may contain affiliate links, view our disclosure policy.
Cake pops are the cutest way to eat cake this holiday season. My Candy Cane Christmas Cake Pops are the perfect sweet treat at your holiday party! First, I simply make a lightened cake batter using Greek yogurt and cake mix. Then, I divide the batter into two bowls and add some red food coloring for a fun surprise inside! Once baked, I use lollipop sticks to dip each cake pop into festive candy melts. Finally, I top each cake pop with crushed candy canes. So festive! These Candy Cane Christmas Cake Pops will bring joy to your friends and family!

Recipes Similar to Candy Cane Christmas Cake Pops:
Birthday Cake Batter Popsicles
4 Ingredient Pumpkin Spice Muffins Recipe

Why Cake Pops?
Technically, you could make a whole Christmas cake for your holiday party. Cutting cake slices could vary the calories per slice anywhere from 400 to 700 calories! In order to portion control my dessert a little better, cake pops are the perfect solution. One cake pop only has around 163 calories per serving. This recipe is perfect for cake lovers that want a small amount of dessert without going over their daily calories!
Who wouldn’t want their dessert in a cute package? If you love your holiday desserts with beautiful presentation, try my Peppermint Merengue Cookie Recipe!

Ingredients in Candy Cane Christmas Cake Pops
- white cake mix
- Greek yogurt
- water
- egg whites
- baking powder
- vanilla
- red food coloring
- cooking spray
- melting wafers or Candy Melts
- red sprinkles
- mini candy canes

How to Make Candy Cane Christmas Cake Pops

Preheat oven to 350 degrees.
Lightly spray the top and bottom of the cake pop pan with baking spray.
In a large bowl, combine the cake mix, yogurt, water, egg whites, baking powder and vanilla in a bowl. Beat until well mixed and no lumps. Optional: Pour half of the batter into a separate bowl and stir in red food coloring. This creates a little surprise when biting into the white chocolate covered pops!
Place the batter into a pastry bag or just use a large ziplock bag with a corner cut off.
Pipe the batter into the prepared cake pop pan, piping each to the rim. Cover with top cake pop pan and lock them into place. Bake for 18 minutes rotating it after 10 minutes. Let it rest for 5 minutes in the pan before opening.
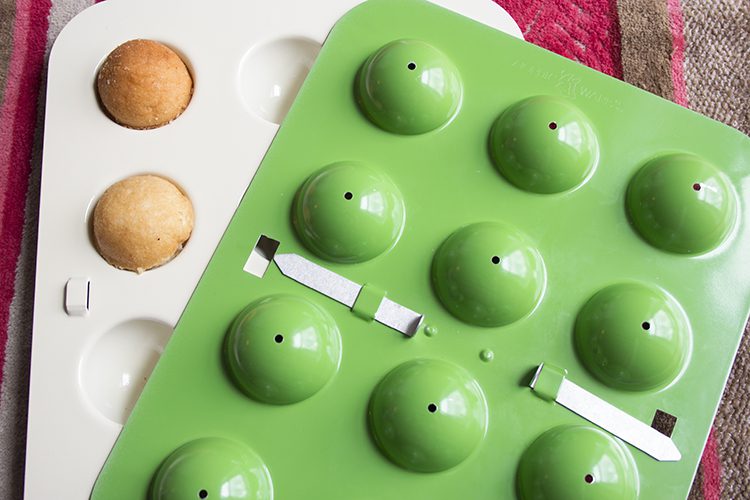
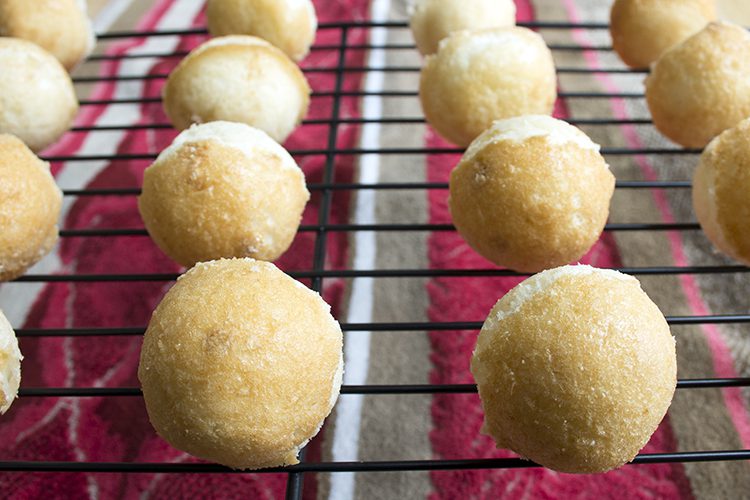
Gently remove the cake pops from the pan to the cooling rack. Repeat with remaining batter. Keep raw batter in refrigerator when not in use.
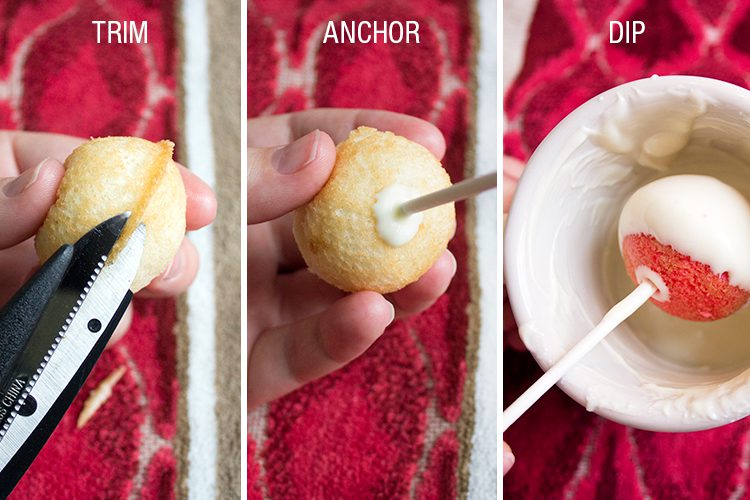
Using scissors or a sharp knife, cut the middle seam off each ball. Freeze the cake balls for about 45 minutes or overnight (if you plan to decorate the next day), this helps the chocolate stick better to the cake.
Next, be sure to have your lollipop sticks and cake balls handy. In small microwave safe mug or bowl, microwave about 12 chocolate wafers according to package directions, don’t burn the chocolate!
Insert one end of the lollipop stick into the melted chocolate, then halfway into the cake ball. This anchors the stick for when it is dipping time. Do this to all of your cake balls. Allow chocolate to harden, about 5 minutes.
If you haven’t already, crush your candy canes. I keep each one in their individual wrapper and use the back of a spoon to crush them. This way, they are easier to sprinkle.
In batches, melt remaining chocolate wafers. For the white cake pops: Dip the cake pops into the chocolate, gently spin it around in the mug until the excess drips off. Place on pop stand or Styrofoam block. Then sprinkle on crushed candy canes before the chocolate dries. For the red cake pops: Set aside 40 white chocolate wafers or 3.8 oz. for “snow”.
When your half way or have as many white pops as you want, add red food coloring to each batch of melted chocolate. Dip the cake pops into the chocolate, gently spin it around in the mug until the excess drips off. If your chocolate has thicken slightly due to the food coloring, use a knife to spread on a thin layer like icing.

Cover the Candy Cane Christmas Cake Pops with red sprinkles and allow chocolate to set, about 15 minutes. To make the “snow,” simply melt the white chocolate wafers (that were set aside) and spoon a small dollop on top. Use a knife and spread down gently to form drips. Sprinkle with crushed candy canes.


Candy Cane Christmas Cake Pops
Equipment
- pastry bag or large ziplock bag
- 48-50 lollipop sticks
- Nordicware Cake Pops Baking Pan
- Nordicware Pop Stand OR styrofoam block
Ingredients
- 1 16.5 oz white cake mix dry mix only
- 1 6 oz Choboni plain Greek yogurt
- 1 cup water
- 3 egg whites
- 1 Tbsp baking powder
- 1 tsp vanilla
- red food coloring
- cooking spray
- 36 oz Ghirardelli White Melting Wafers OR 42 oz. of Wilton Candy Melts
- red sprinkles optional
- 12 miniature candy canes or peppermint sticks crushed
Instructions
- Preheat oven to 350 degrees.
- Lightly spray the top and bottom of the cake pop pan with baking spray.
- In a large bowl, combine the cake mix, yogurt, water, egg whites, baking powder and vanilla in a bowl.
- Beat until well mixed and no lumps.
- Optional: Pour half of the batter into a separate bowl and stir in red food coloring. This creates a little surprise when biting into the white chocolate covered pops!
- Place the batter into a pastry bag or just use a large ziplock bag with a corner cut off.
- Pipe the batter into the prepared cake pop pan, filling each to the rim.
- Cover with top cake pop pan and lock them into place.
- Bake for 18 minutes rotating it after 10 minutes.
- Let it rest for 5 minutes in the pan before opening.
- Gently remove the cake pops from the pan to the cooling rack. Repeat with the remaining batter.
- Keep the raw batter in the refrigerator when not in use.
- Using scissors or a sharp knife, cut the middle seam off each ball.
- Freeze the cake balls for about 45 minutes or overnight (if you plan to decorate the next day), this helps the chocolate stick better to the cake.
- For this next step be sure to have your lollipop sticks and cake balls handy. In small microwave-safe mug or bowl, microwave about 12 chocolate wafers according to package directions, don’t burn the chocolate!
- Insert one end of the lollipop stick into the melted chocolate, then halfway into the cake ball. This anchors the stick for when it is dipping time. Do this to all of your cake balls.
- Allow chocolate to harden, about 5 minutes.
- If you haven’t already, crush your candy canes. I keep each one in their individual wrapper and use the back of a spoon to crush them. This way, they are easier to sprinkle.
- In batches, melt remaining chocolate wafers.
- For the white cake pops: Dip the cake pops into the chocolate, gently spin it around in the mug until the excess drips off. Place on pop stand or styrofoam block. Then sprinkle on crushed candy canes before the chocolate dries.
- For the red cake pops: Set aside 40 white chocolate wafers or 3.8 oz for “snow”. When your halfway or have as many white pops as you want, add red food coloring to each batch of melted chocolate.
- Dip the cake pops into the chocolate, gently spin it around in the mug until the excess drips off.
- If your chocolate has thickened slightly due to the food coloring, use a knife to spread on a thin layer like icing. Cover with red sprinkles and allow chocolate to set about 15 minutes.
- To make the “snow,” simply melt the white chocolate wafers (that were set aside) and spoon a small dollop on top. Use a knife and spread down gently to form drips. Sprinkle with crushed candy canes.
Notes
did you make this recipe?
Make sure to follow on Pinterest @ourfarmerhouse and on Instagram @ourfarmerhouse


Stay Connected!
I love comments from you, so feel free to leave your thoughts and let’s chat more below! You can also follow the Farmers on your favorite social platform!
Join The
Farmer House Family
Subscribe to our weekly newsletter for exclusive content offers and access – just like family.